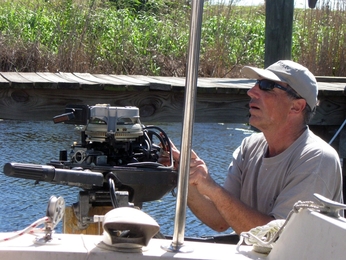
Dave checks out Orion Jr's engine before heading out
After 2 days on the road, we arrived at LaBelle late on Monday, November 5th. Our work on Orion Jr began in earnest the next day (Election Day, by happenstance) and continued for almost 2 weeks before we finally declared victory and set out down the Caloosahatchie River toward Florida's west coast. The boat fared well over the long, hot summer. With a little cleaning and a few small repairs, she was back in shape to travel. We made some improvements as well, with the most significant being the addition of lazy jacks and a stack pack for her main sail. By Tuesday, November 20th, we dropped the dock lines and headed out. It was good to be moving again.
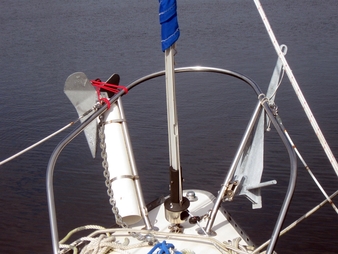
Anchors re-mounted on the bow
Cleaning Up and Fixing Up
The good news about Orion Jr
when we returned to her was that most everything was as we left it. Most
systems: engine, electrical, solar panels, sails, refrigeration – started back up or were re-mounted with out a hiccup. After a few hours pulling everything we had stowed below back up on deck (boom, dinghy, dinghy motor, canvas, solar panel, anchors, etc.) and “fogging” the boat just in case there were any little pests on the boat, Cathy began methodically cleaning all the surfaces to remove any dirt, mildew, etc and restoring the interior to order. As the sun began to
set on our first day, we had canvas covering the cockpit, ice beginning to freeze in the freezer, water that we could use to clean with (but not yet drink) and a bed to sleep in.
However, everything wasn't completely rosy either. There was evidence of water in the main saloon from a leak in the starboard aft portlight. We knew about the leak but had hoped we had sealed it enough to get through the summer. Not so. The solar vent in the forward hatch was no longer working. Shortly after our return, the water faucet stopped working, although Dave was able to confirm that the pump was working fine. The inverter started spewing out white smoke when we turned it on for the first time, so it was toast. The dinghy motor's fuel line had a leak in it and needed replacing. Three of the wooden blocks that we had epoxied in place to hold brackets to support the dinghy seats and one which held a bracket for the water tank strap had fallen off, presumably due to the heat of the Florida summer. Another impact of the heat was the melting of the gaskets on the alcohol stove, which prevent the alcohol from evaporating. The anchor locker was wet and the lines
in it wet and mildewed as a result. Although how the water got inside is still a puzzle. We had several dock lines that were partially in the water, which were now filthy and smelly. And, last but not least, the boat was DIRTY. Green streaks along the foredeck, black soot all over the deck, pink residue from standing water in the cockpit that had evaporated, and spider webs throughout the rigging.
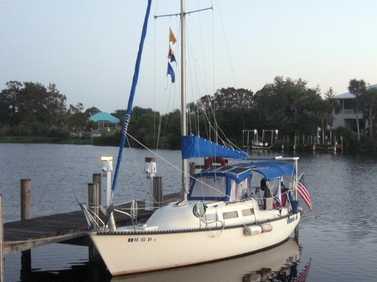
Orion Jr cleaned up and moving again.
Attacking each problem one-by-one, we replaced the solar vent and faucet under warranty with a trip to West Marine in Fort Myers. Dave replaced the fuel line and bought another length of fuel line for future repairs, which are inevitable. We
epoxied the blocks back in place, this time carefully sanding and cleaning both the bottom of the block and the hull where each would be attached. Dave made up a thicker epoxy with some mat in it to make a better bond with the hull. All but one seemed to hold after the first try. It took 3 tries for the last one, but it is now holding. After a quick check of the internet, we found an inexpensive and effective replacement for the alcohol stove gaskets at the dollar store --- rubber sink drains. Cathy just cut off the nub at the top and a perfectly sized gasket was formed. Dave hauled the anchors out of the anchor locker and opened it up for several days to dry out. As for the dirty dock lines, we soaked them for several days in water and boat soap, which helped loosen the dirt, but didn't really remove it (or lessen the smell.) So, we finally took them up to the marina office, where we had access to running water and started scrubbing them inch by inch. For 2 of the lines, this worked well enough to get them clean. For the third line, we declared it beyond hope and tossed it. Next year, we'll make sure the lines stay out of the water. Then there was the matter of cleaning the outside of the boat. With no water on the dock, we decided to use the water in the tank for cleaning and thereby drain the tank. We would haul water for drinking from the fuel dock at the marina office in the other basin. Cathy made a first pass, which removed the more obvious green streaks and black dirt on the foredeck. Dave did the same in the cockpit. However, more needed to be done. We finally got our chance at our first night out of the marina, on the dock at Franklin Lock. Cathy scrubbed every inch of the deck for a couple of hours, and the boat looked much better.
epoxied the blocks back in place, this time carefully sanding and cleaning both the bottom of the block and the hull where each would be attached. Dave made up a thicker epoxy with some mat in it to make a better bond with the hull. All but one seemed to hold after the first try. It took 3 tries for the last one, but it is now holding. After a quick check of the internet, we found an inexpensive and effective replacement for the alcohol stove gaskets at the dollar store --- rubber sink drains. Cathy just cut off the nub at the top and a perfectly sized gasket was formed. Dave hauled the anchors out of the anchor locker and opened it up for several days to dry out. As for the dirty dock lines, we soaked them for several days in water and boat soap, which helped loosen the dirt, but didn't really remove it (or lessen the smell.) So, we finally took them up to the marina office, where we had access to running water and started scrubbing them inch by inch. For 2 of the lines, this worked well enough to get them clean. For the third line, we declared it beyond hope and tossed it. Next year, we'll make sure the lines stay out of the water. Then there was the matter of cleaning the outside of the boat. With no water on the dock, we decided to use the water in the tank for cleaning and thereby drain the tank. We would haul water for drinking from the fuel dock at the marina office in the other basin. Cathy made a first pass, which removed the more obvious green streaks and black dirt on the foredeck. Dave did the same in the cockpit. However, more needed to be done. We finally got our chance at our first night out of the marina, on the dock at Franklin Lock. Cathy scrubbed every inch of the deck for a couple of hours, and the boat looked much better.
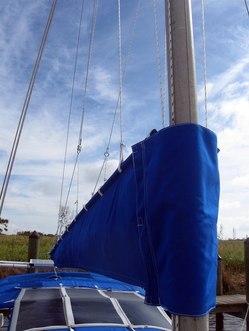
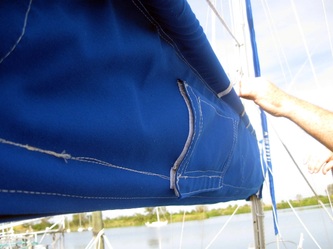
Orion Jr's new stackpack
Stacking the Sail
Over the summer, Dave had been considering adding lazy jacks to our main sail on Jr. (Lazy jacks are lines that surround the main sail to keep it contained as it comes down after a sail.) However, a couple of weeks before leaving Hampton, he expanded on this idea, suggesting we (i.e., Cathy) build a stack pack to hold the sail as it came down. (A stack pack is like a big cloth cradle that contains the sail as it lays down. Once the sail is down you simply zip up the stack pack and the sail is stowed.) Since a stack pack is so big, it would require a big space to lay it out. So, Cathy arranged to work on it after hours at the canvas shop. It was a godsend.
We spent some time studying other designs on the internet, opting for some features we liked and rejecting others. We had most of the relevant measurements from Jr, but we had to make a few guesses. We needed the height of the sail as it sat on the boom. After briefly considering a call to our neighbor in LaBelle to take an actual measurement, we quickly abandoned that idea when we remembered that the boom was down below. Next, we tried to estimate the height by finding a similar boat in our marina in Hampton and
measuring its sail. Another key consideration was how the main attached to the boom. Was it via slides or a rope that slid along the length of the boom. After some back and forth, we decided it had slides. With an overall concept and measurements in hand, Cathy laid out a design on paper and made a list of supplies needed to build it. We had some of the supplies on Jr and some on Orion. All others we would buy from Cathy's work.
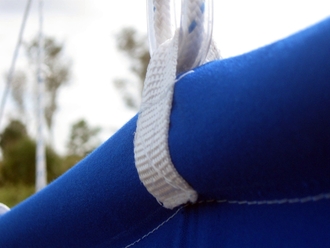
Lazy Jack line attachment point
Since time was running out, we decided
to take advantage of our idle time during Sandy's fury to begin. On Monday
during the storm, Cathy didn't have to work, but, knowing the store was open, we decided to go there and escape the cold and wet by beginning the stackpack. With Dave's help, Cathy measured and laid out the design on a long piece of sunbrella. Once we had double-checked the measurements a few times, we cut the material and Cathy began sewing. One of the bigger question marks was where and how to attach the lazy jacks to the stack pack. We considered a number of options and finally decided on webbing strips attached to the pocket that would hold the poles that support the stack pack. But where to put them? Since this would be impossible to assess without actually raising the sail, we decided to add webbing strips about every foot along the length of each side of the stack pack. Once it was installed, Dave could try different locations to see which would work best for the lazy jacks. To prevent chafe between the lines and the webbing, Dave would run the lazy jack lines through clear tubing.
While Cathy sewed, Dave helped by cutting webbing lengths, burning the ends and preparing other components. It was all going together pretty well, and we were almost done with the work we
could do before returning to the little boat. All we had to do was install the 2nd half of the long top zipper. That's when Cathy discovered a big ooops. She had laid out the starboard side of the stack pack on the wrong side of the material. So, after a night of picking out stitches and another day re-sewing what she'd done before, she finally sewed in the zipper half and the two halves went together well. Perfect. All we had to do now was fit it on Orion Jr.
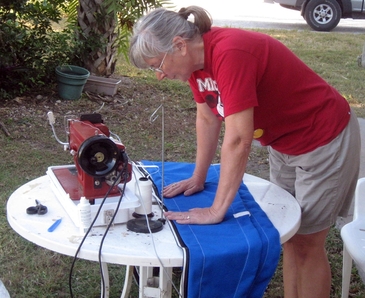
Cathy fits a zipper on the stack pack before sewing
Back in LaBelle, it was a few days before we could try the stack pack on the boat. We quickly discovered a few surprises. First, the main sail didn't attach with slides, it attached with a luff rope. So, our original design wouldn't work. We thought about this and decided we would just connect the stack pack under the boom. The original design had a half-dozen webbing straps attach to both sides of the stack pack above the boom and below the sail. This kept the sail and the stack pack from falling down below the boom, if we lowered the lazy jacks (which hold up the stack pack). Since we couldn't use the straps any more, we decided to use the zipper from the now obsolete main sail cover to close up the bottom of the stack pack. And we would now not be able to lower the lazy jacks when under sail, since the stack pack would fall off the boom. The next surprise was how short the sail was as it lay on top of the boom. We had a lot of excess built in. Fortunately, with the change to have the cover connect under the boom, the excess material would come in handy. Finally, we discovered the overall length was a tad short, about 2 inches. To solve this, we would add material on either side of the top zipper's tail (made extra long to allow the stack pack to open wide).
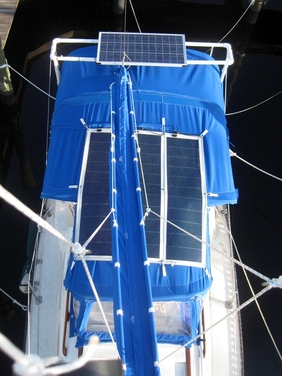
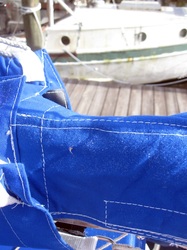
Completed Stack Pack from above with lazy jacks attached.
So, Cathy went back to work at the sewing machine: trimming and hemming the bottom, installing a zipper, adding a cover for the zipper tail, adding D-rings to secure the fore and aft ends, putting reinforcing material on the inside to protect it from the outhaul and boom cleat, and adding a flap to give access to the boom cleat. Finally, she made a panel to go around the mast, which would zip into the forward end of the stack pack. After a couple of days, the sewing was done, the stackpack installed, and Dave went to work building the lazy jacks.
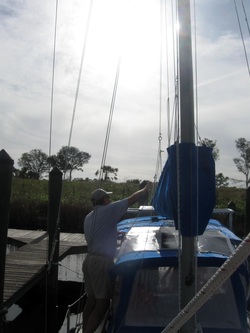
Dave rigging the lazy jacks
Setting Up the Lazy Jacks
Having studied (and assisted with) the installation of lazy jack lines on other boats, such as Steve's Bay Dreamer, Dave had some idea of the pitfalls of rigging them on Orion Jr. Some initial decisions to be made were the number of attachment points to the stackpack and the rigging attachment point. For a 26ft boat, such as Jr, most standard designs call for only 2 attachment points on the boom. He had heard from Steve, that he would have at least one more on Bay Dreamer. And, since ours would be doing double-duty –containing the sail and holding up the stack pack-- and since it is especially difficult to reach over the bimini toward the middle of the boom, Dave opted to have 4 attachment points.
Before arriving in LaBelle, Dave had purchased the few materials he needed to rig the lines: 3/16" diameter line, 6 stainless steel rings, and 2 small blocks. With the supplies and the stackpack in place, he began taking a stab at rigging the lines. After each attempt, we raised and lowered the main, looking for places where the battens got stuck or there was potential chafe on the main. In addition to these considerations, he wanted to make sure the rigging was parallel and looked symmetrical as well.
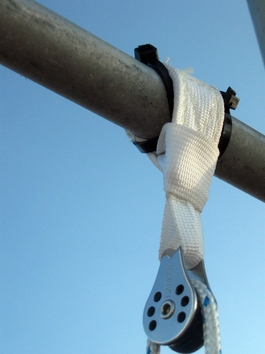
Webbing loop holds block on spreader for lazy jack lines
While testing his designs, Dave had just thrown the line over the spreaders. Once he was happy with the design and had successfully tested it, we had to decide how to attach them permanently. He wanted them suspended from the spreaders on a block (i.e. pulley) a few inches out from the mast. Not being sure of the location, he was reluctant to drill a fitting into the spreaders. So, we decided to make a webbing loop that would hold the block and that could be wrapped around the spreader arm. To prevent them moving side to side, we put cable ties in an X around the webbing. The result seemed very solid, but if issues arise, they should be easy to move.
Now, all we have to do is actually use the main sail.
Now, all we have to do is actually use the main sail.
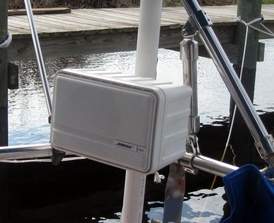
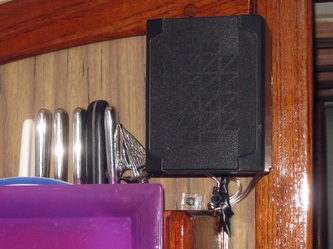
Orion Jr's new cockpit speakers
More Boat Stuff
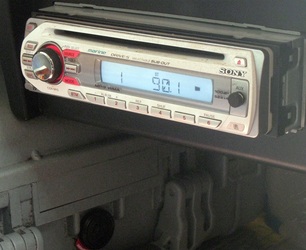
So, by now, only the die-hard boaters are still reading, but we did actually do a few more boat projects beyond the lazy jacks and stack pack. A fellow boater at Joy's Marina was selling his marine stereo system and speakers before moving back north and we bought it, just assuming we would find a place for it. As usual, it took some trial and error to find a spot, but we managed to fit the receiver into the Main Saloon just above the freezer. We installed the speakers on the support for the rigid solar panel, just above the stern rail on the port and starboard corners of the cockpit. Then, after mentioning our desire for small bookshelf speakers to put inside the cabin, our neighbor, Robert, fished out 2 speakers that were just the right size to fit in the galley just outside the opening to go forward to the V-berth. Now we have music wherever we go.
So, by now, only the die-hard boaters are still reading, but we did actually do a few more boat projects beyond the lazy jacks and stack pack. A fellow boater at Joy's Marina was selling his marine stereo system and speakers before moving back north and we bought it, just assuming we would find a place for it. As usual, it took some trial and error to find a spot, but we managed to fit the receiver into the Main Saloon just above the freezer. We installed the speakers on the support for the rigid solar panel, just above the stern rail on the port and starboard corners of the cockpit. Then, after mentioning our desire for small bookshelf speakers to put inside the cabin, our neighbor, Robert, fished out 2 speakers that were just the right size to fit in the galley just outside the opening to go forward to the V-berth. Now we have music wherever we go.
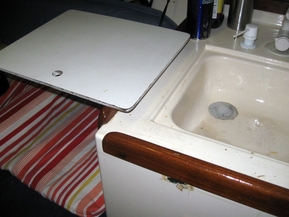
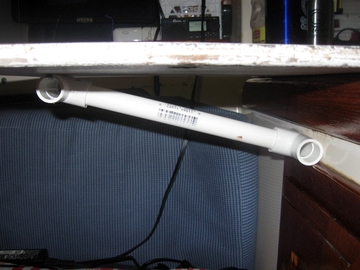
The lack of counterspace in the galley is an ongoing issue for Cathy when making meals. Dave managed to come up with an ingenious solution. He installed a bracket made out of PVC underneath the sink cover, that allowed it to mount as a side shelf beside the sink. It's a simple solution that works amazingly well. After finishing the stackpack, Cathy didn't put the machine away right away. Another cruiser had sustained some damage to his bimini over the winter, so she offered to repair it for them. A few hours later, the bimini was good as new, and the owners seemed pleased. She also used the old mainsail cover to make a generator cover. Last season, we had had some problems with furling line jamming in as we unfurled the sail, so Dave replaced the line with a smaller diameter that works much better now.

Oranges ripening on a tree as the harvest season begins
Ready to go
We didn't spend much time socializing over the 2 weeks we were working on the little boat. However, we really enjoyed a dinner with Robert (our neighbor) and his dad at the local Log Cabin BBQ restaurant. This is a wonderful little place, with good food and great service (you are offered free soup and free dessert or something equivalent) and listening to Robert and his dad tell tales of their adventures was a treat. Both are experienced welders and his dad is currently helping to build a huge alligator head that will be mounted on a huge sculpture in Biscayne Bay (similar to Christo's surrounding the islands with pink years ago) that is to be put in place next year.
We made one last trip across the state to drop off the car for Rick and Carla, which gave us a chance to stop by a roadside stand and buy the first of this seasons' fresh citrus. It is early, but it is still so good!. (On the way into LaBelle, we had stopped at Florida Natural's visitor center on the way south
from Orlando. If you ever go by there you should stop. It is a neat place, and yes they have free samples.) Fully loaded with fruit and other essentials, we prepared to drop the lines, which we successfully did the next morning, making our way west to some new and some familiar ports of call.
