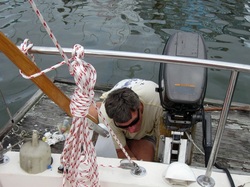
Dave installs new thru-hull on transom
We’ve managed to get a number of the big projects done on Orion Jr, and have started to move the inventory of “stuff” on board that will help make it our new home for the next few months. That doesn’t mean we’re done working on her. But we know we have to get moving or we’ll freeze in place.
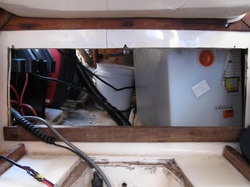
Water Fun
Although the original Columbiadesign included a built-in water tank, ours had been removed at some point in its past. Also, the sink faucet had been removed. Having a water tank and working sink faucet were high priorities if we were going to live aboard. After considering lots of options, we stumbled across a water tank on clearance at West Marine, that we calculated would fit into a spot under the cockpit sole. The water tank would feed a Shurflo pump, which is gravity-fed. This pump is controlled by a companion faucet that Dave mounted on the galley sink.
Although the original Columbiadesign included a built-in water tank, ours had been removed at some point in its past. Also, the sink faucet had been removed. Having a water tank and working sink faucet were high priorities if we were going to live aboard. After considering lots of options, we stumbled across a water tank on clearance at West Marine, that we calculated would fit into a spot under the cockpit sole. The water tank would feed a Shurflo pump, which is gravity-fed. This pump is controlled by a companion faucet that Dave mounted on the galley sink.
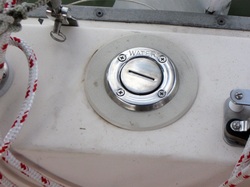
New water fill
The plumbing required 4 hoses to be run: one from the water tank
to the pump; one from the pump to the sink; one from the tank to the on deck fill and one to vent air to a through-hull. Since the pump is gravity fed, we decided to mount it on the surface at the base of the water tank. Given this location, hooking up the 3/8” hose from the tank to its inlet port was pretty straightforward. Running the hose from the outlet to the sink required a little more work, since it had to be fished under the main saloon floor and up under the sink. For the vent hose, we decided to use an through-hull that originally routed the bilge pump into the
cockpit, so that any water could drain out of the cockpit scuppers. We hadn’t like this arrangement, so we moved the bilge pump hose to a new through-hull, which Dave installed on the transom, and then attached the ¾” water vent hose to its old fitting.
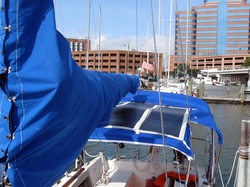
Solar panels mounted on bimini
How’s that enclosure coming?
Cathy continued her work on the canvas enclosure, cleaning up some loose ends, literally and then adding webbing loops and a wire channel to allow Dave to mount 3 of the flexible solar panels.
Before beginning work on the any of the window panels, she had to ensure the bimini structure was firm. To that end, she decided to install struts to support the forward bow (over the cabin top) and aft bow (mounted on the stern rail). This was simply a matter of hardware (mounts, end caps) and a few cuts on a stainless steel pipe. With these in place, the structure was not going to move and the patterning of the enclosure was ready to begin. This process has begun, but more on that in the next update.
With the rain we’ve had the past few weeks, the bimini was getting its test for watertightness.
And water was seeping in through the webbing loops that Cathy added for the solar panels. So, we decided to waterproof the bimini, using the leftovers to apply to the sail cover, which had obviously not been done for years.
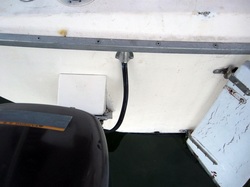
New clamshell fitting allows engine wires thru
Other boat stuff
There have been another long list of smaller projects on the boat. We installed 2 new stern
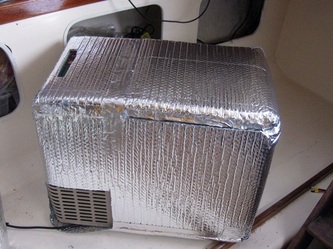
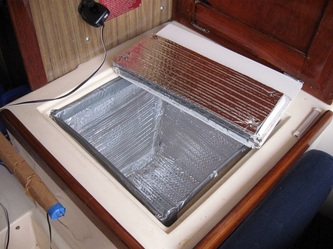
cleats to match those we added to the bow. Dave drilled a hole in the transom to allow the engine wires to pass through to the batteries. Using Reflectix, a mylar-coated bubble wrap, we insulated the ice box and the Waeco fridge to (hopefully) reduce its power draw and extend the life of the
ice it makes. Cathy also installed weatherstripping around the ice box lid to reduce the leakage.
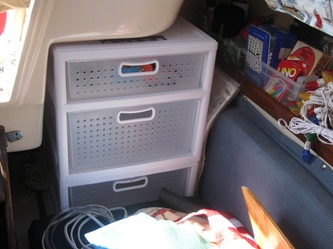
With the solar panels installed on the bimini, Dave ran the wires through the cockpit coaming and connected them to the solar controller. Since storage space is at a premium, we found a set of storage drawers that would (just) fit under the companionway. Finalizing the use of these 2 alcoves allowed Cathy to shorten the settee cushions.
And the list goes on.
Parting Shots
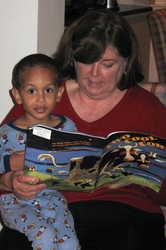
We took a little time out to visit our daughter’s family and Cathy’s family in NC. Our grandson
Troy took his first trip with us to NC as well, entertaining and exhausting us for the 2 days
of our visit. We will hopefully get in one more visit to the kids and grandkids before we leave, but we have returned the car we’ve been borrowing all summer to its owner, our friend Sue, and our days and trips (by land) are becoming fewer.
