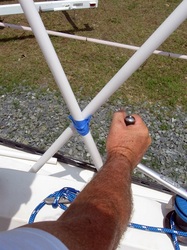
Dave determines position for new bow cleat
With the 2nd weekend in September, Mother Nature sent a blast of colder air through the Southeast that was a wake-up call (as if we needed one) that summer was fast disappearing. As the temperatures plunged from the 90’s on Thursday to the mid-60’s on Friday, we struggled into our jeans and sweatshirts and re-doubled our efforts to get to a stopping point on Orion Jr. It will be cold before
long, and we need to be on our way to warmer weather – “done” or not.
long, and we need to be on our way to warmer weather – “done” or not.
Materials laid out for the new bimini
Blocking out the sun
One of the bigger projects that was a “must” on our list before heading south was providing some shade and weather-protection in the cockpit. That meant building a bimini and at least part of an enclosure.
Cathy had done some smaller canvas projects in the past – cockpit pockets, a cover for the generator box, a modification to the helm cover. But this was going to be a whole new dimension. An enclosure would have to be designed, a frame built and the canvas sewed and mounted so that it fit securely and looked nice. This seemed like a tall order for someone who barely knew how to thread a sewing machine.
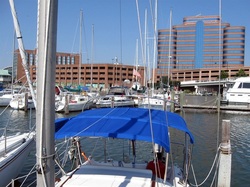
Despite serious misgivings, Cathy bought a book to get started. It recommended that she build a mock frame out of PVC and tape that would give us an idea of how a possible design might work before casting it in stainless steel, strataglass and canvas. We wanted a design that would cover the most area, but allow us to sail the boat, go forward from the cockpit, mount the solar panels, and hopefully, stand up if necessary. It also had to fold up
reasonably well for trailering. With the backstay and mainsheets descending into the aft third of the cockpit, this wasn’t going to be the straightforward design of Orion’s center cockpit enclosure. Cathy talked through possible designs with Dave and our friend Pat, who builds canvas professionally. Using lots of measurements of the cockpit dimensions, she put a tentative design on paper.
There would be 4 bows. The forwardmost would be a single bow mounted on the cabintop. The next 2 would be attached at a single mount point on the cockpit coaming forward of the winch. The 4th would be a single bow mounted on the stern rail. The canvas that stretched over the first 3 bows would be continuous. However, the section between the 3rd and 4th bow would have to come down when sailing to allow the mainsheets free movement when the main was up. This panel also had to accommodate the backstay passing through it. Now we would try to build a mock frame that resembled this design to see if we could make it work.
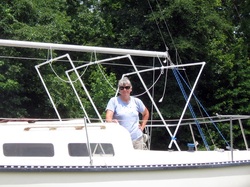
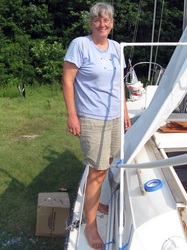
Cathy stands in mock-up of bimini frame
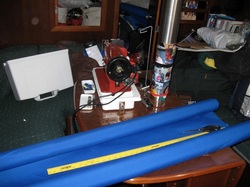
Having raised the boom to accommodate standing headroom in the cockpit, we felt pretty confidant our bimini design would allow Dave to stand up as well. So, with the raised boom in place, Cathy had Dave stand in the cockpit, and we tried to guess what height would allow him to stand, but still have room for the frame, the canvas and solar panels above him without interfering with the boom. We set this height at 74” above the cockpit floor. Then we strung a line from the mast to the backstay to mark this height. We bought several pieces of PVC, several couplers and some masking tape and started our construction with the forward bow, since this seemed to be the simplest. After assembling the pieces to the dimensions in Cathy’s design, we had to adjust pole lengths and angles to make it work. Then Dave used his knot-tying expertise to suspend the frame from the height line. We stood back to admire our work and then discovered quickly that the design wouldn’t work. It was going to be way too wide, and would not allow us to move forward on deck without a struggle. Now what?
We realized that the section above the cabin top had to be narrower and mount inside the grab rails. That meant there would be 2 different panels of different widths on the first 3 bows, instead of one continuous line. It seemed a little odd, but we decided to proceed with that approach and run it by Pat for a reality check once we had mocked up the rest of the frame. Throughout the rest of a hot 8 hour day, we sawed, taped, tied up and measured to get a frame that we thought we could turn into an actual enclosure. We took pictures of the finished design and all the significant
measurements. Then we sent it off to Pat for a review. She gave us her comments, none of which were:“What on earth were you thinking?” which Cathy took as an endorsement to proceed.
measurements. Then we sent it off to Pat for a review. She gave us her comments, none of which were:“What on earth were you thinking?” which Cathy took as an endorsement to proceed.
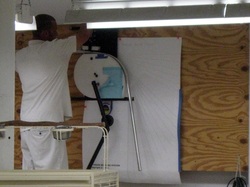
Bending bows for frame
The next challenge was going to be where to get the bows bent. We talked to some canvas makers in the Mayo MD area, but decided it would be better to do the work in Hampton, where we could be living and sewing on Orion while working on Orion Jr. Then we found someone in Hampton, Jo at Canvas and Cushions, who was willing to take Cathy’s measurements and bend the frames. She met us on the boat the Monday after we arrived back in Hampton. We showed her the design on paper and the mount points marked on the boat with tape. She graciously helped with a few design issues and seemed OK with the somewhat unconventional design. A couple of weeks later the bows were done and we began mounting them. (The next day, as you may remember, we got to strap them down for Irene.)
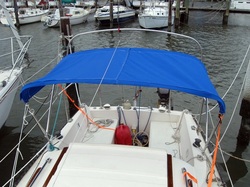
Middle panel on for first fitting
So, after a summer of stops and starts, it wasn’t until early September that Cathy hauled out her newly acquired Sailrite sewing machine and began sewing Sunbrella panels for the enclosure. She started with the panel that would cover the middle 2 bows, sewing a panel that was the distance between the bows plus 1 yard. At Pat’s suggestion,
Cathy marked the bow positions directly on this fabric, using the excess fabric for the sleeves that would hold the panel on the bows. A couple of days later, a bimini suddenly appeared where the hadn’t been one before. Maybe this really was going to be possible.
The next task was the forward panel or “dodger” section of the bimini. It was a little simpler than the middle panel, because there was only one bow. Another few days and there were 2 panels mounted. Wow! But she saved the most complex for last. The final panel had to accommodate the backstay. Dave had (thankfully) suggested we just take the mainsheets off the boom when we weren’t sailing to remove this complexity from the design. Cathy decided to make a drawstring sleeve to hopefully minimize the size of the opening for the backstay. Without a pattern to go by, she made her best attempt, which looked OK, but was woefully too big a hole. Rain would be able to pour through the opening. It’s back to the drawing board for that one.
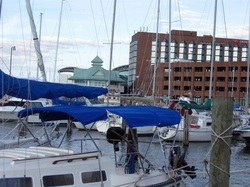
All three panels in place, but still a work in progress
But at least 3 panels are near completion and the finishing work on them seems doable. The next task will be to pattern and build the enclosure. This involves sewing the very expensive clear vinyl Strataglass material that will become the windshield. It’s not something you want to make a mistake on. Stay tuned for how that goes.
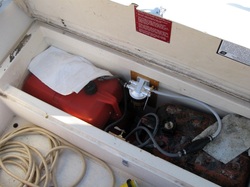
New fuel filter, valve and hoses in place
More Boat Stuff
So, what has Dave been doing to keep busy? The easy answer to that is everything else but the canvas.
On our trip down the bay, we were unhappy with the way we had to manage fuel. We needed to have
another fuel tank that could be easily deployed, so that we had more fuel capacity at hand for longer trips. Dave solved this by arranging the fuel locker with the 2 6-gallon fuel tanks end to end on the top level. He then plumbed them to a valve that would allow us to easily switch from one tank to the other. Then to ensure the fuel going to the engine was as clean as possible, he positioned a filter between the valve and the engine, with a glass bowl that lets us see the fuel and filter. It can also be easily drained if any water is found in it. That should take some of the stress out of our fuel management.
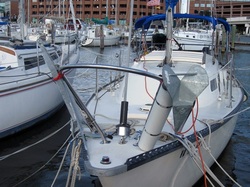
New Delta anchor mounted on bow
Our other concern from our shakedown cruise was the ground tackle. Dave had wanted a Delta 22 anchor for the little boat, instead of the 3 danforths that it came with. He was consistently frustrated in finding an inexpensive Delta 22, so he decided to start out with a Delta 14, which should be the right size for the boat. Using an idea from a boat we saw in Mayo, he cut a piece of 4” PVC drain pipe and clamped it to the bow pulpit to mount the anchor out of the way. The next piece of the puzzle was finding a convenient place to store the
rode. There was a sizeable anchor locker, but no deck fitting to access it. Dave installed a small hawspipe (metal fitting with a cap) on deck to provide that access. Since the Columbia has cored decks, he drilled the holes for the fitting and the screws a little big and then coated them with epoxy to seal the wood core, before through-bolting it on. With the deck access in place, Dave was able to load the anchor locker with rode for the primary and secondary anchors, the primary anchor being the Delta.
rode. There was a sizeable anchor locker, but no deck fitting to access it. Dave installed a small hawspipe (metal fitting with a cap) on deck to provide that access. Since the Columbia has cored decks, he drilled the holes for the fitting and the screws a little big and then coated them with epoxy to seal the wood core, before through-bolting it on. With the deck access in place, Dave was able to load the anchor locker with rode for the primary and secondary anchors, the primary anchor being the Delta.
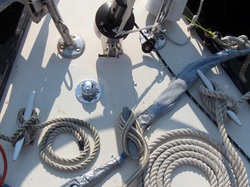
Two new bow cleats and new hawspipe
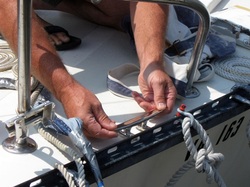
The final improvement that would complete the ground tackle upgrade was to install 2 new, larger bow cleats to accommodate the anchor rode or a bridle. These would have the additional beneficial effect of allowing a more secure tie up to a dock as well – the need for these highlighted by our preparations for Irene. Using the same technique of drilling oversize holes that were then filled with epoxy, Dave through-bolted the new cleats in place on either side of the existing central bow cleat supported by a 5/8”piece of wood. With all the upgrades done, we feel much better about our set-up for anchoring out.
There’s also a long list of smaller projects: replacing the fuel vent hose, getting new storage cabinets to fit under the stairs, repairing an anchor bag, upgrades to the water system, and sorting through things on Orion that will need to be moved to the little boat. Lots of things still need doing, but the list of the must-do’s is getting shorter.
There’s also a long list of smaller projects: replacing the fuel vent hose, getting new storage cabinets to fit under the stairs, repairing an anchor bag, upgrades to the water system, and sorting through things on Orion that will need to be moved to the little boat. Lots of things still need doing, but the list of the must-do’s is getting shorter.
Bay Days 2011
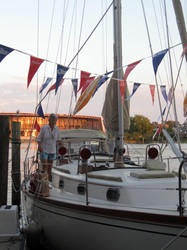
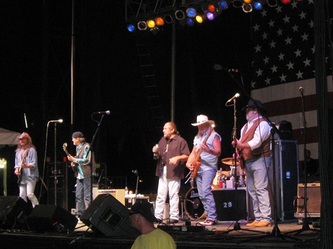
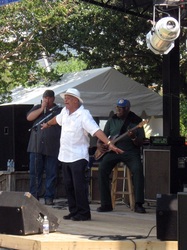
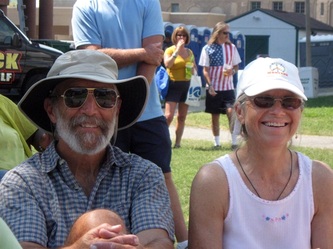
Hampton’s annual Bay Days festival fell on a beautiful late summer weekend, and we got to enjoy more of it this year when Rick and Carla from Euphoria arrived in time to share it with us. With their spot on the Hampton Public Piers, they were in the thick of the festivities. This year, we sampled more of the many bands that were performing throughout the weekend.
Hampton’s annual Bay Days festival fell on a beautiful late summer weekend, and we got to enjoy more of it this year when Rick and Carla from Euphoria arrived in time to share it with us. With their spot on the Hampton Public Piers, they were in the thick of the festivities. This year, we sampled more of the many bands that were performing throughout the weekend.
The clock’s ticking
Despite taking breaks for the festival and to visit with friends, we are never too far away from Orion Jr, and the next task to do. So far, the weather has been reasonably kind, but we know it’s getting colder. And we will eventually have to cut those docklines and head out.
Despite taking breaks for the festival and to visit with friends, we are never too far away from Orion Jr, and the next task to do. So far, the weather has been reasonably kind, but we know it’s getting colder. And we will eventually have to cut those docklines and head out.
