He then handed it over to Deltaville Boatyard’s gelcoat expert, Stanley, who did a beautiful job filling the gouges and restoring the smooth finish to Orion’s starboard side. Even knowing where the damage originally was won’t help you find evidence of it now. With the repairs completed, we were almost done. Dave had talked to a fellow boater who sung the praises of the effectiveness of Colinite Fleetwax. He had used their heavy duty paste wax product that had resisted the inevitable ICW stain for most of the winter. After then seeing the product survive being acid washed on another boat, Dave was sold. We applied one coat of Colinite’s liquid cleaner wax and then followed with the paste wax. Of course, Orion now gleams, but we’re hoping the shine won’t fade so quickly this year. Time will tell.
Stripping Down
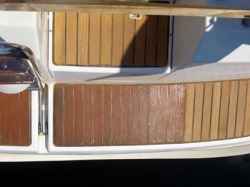
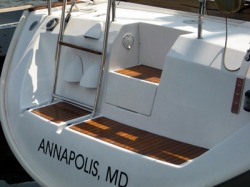
Swim platform in the midst of sanding.
Although we have been keeping up with the maintenance of our teak, over time the finish has dulled and darkened, and some areas were showing signs of more significant wear. So, we decided to begin the process of stripping the teak down to bare wood to start with a fresh surface. Since we were going to put in that much work, we decided to switch from Cetol Light to Cetol Natural Teak, which we’ve heard good things about from a number of sources. Cathy started with the swim platform and the side steps, sanding down to the wood, and then applying 4 coats of Cetol. The results made the effort worthwhile.
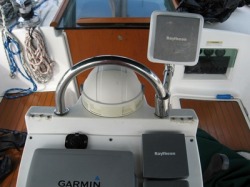
Helm with Raymarine Tridata mounted in NavPod.
With a new, larger chartplotter now installed at the helm, we had displaced one of our Raymarine instruments, which now had to be relocated into a NavPod, mounted onto a metal arm. We purchased the NavPod online, but it arrived with a fixed sleeve that could not slide onto the curved rail at the top of our pedestal. So, Dave began looking for a solution. He finally found it on a website selling bimini hardware. It was a T fitting, that opened in 2 halves with a hinge. It still needed some grinding to ensure a solid fit, but once fitted, the arm was strong.
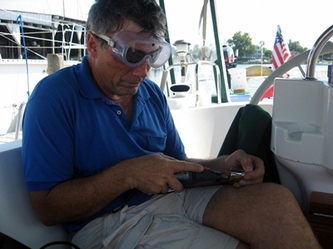
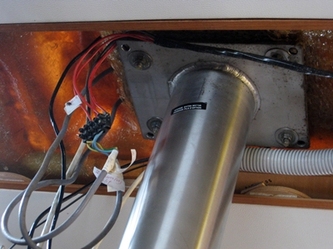
Now, with all the instruments in place, Dave began to re-connect them to power and to each other. Once Dave realized, with the number and complexity of the connections that would be required, it merited a plan to ensure he didn’t miss anything. With the plan in place, he could order enough of the connectors he needed to ensure the splices would be solid and watertight. Next, we began running the new wires that would be needed, in increasing order of difficulty: first, from the helm to the engine room, second, from the autopilot computer to the engine room, third, from the engine room to the nav station, and finally, from the nav station to the base of the mast.
With the wires run, the next step was to start connecting them and then to test the results. Dave powered up the chartplotter, and then connected it to its GPS. He also re-powered the wind and autopilot and connected their SeaTalk wires to each other. The Garmin would now give us our position, track to a waypoint, and display charts and routes. But one of the advantages we were looking to gain with the new chartplotter was to get AIS information (i.e., position and bearing of other boats) at the helm. So, it felt like a major victory when we connected the AIS to the Garmin and began seeing boats in motion on the Bay.
But we couldn’t leave the existing instruments behind. Once we had the TriData installed in its new NavPod, we ran the wires down the metal arm and into the pedestal to enable it to connect to power and the other Raymarine instruments. With the SeaTalk connections restored and the new NEMA 0183 connections in place, we were able to view depth, speed, wind, etc. on the MultiData instrument below decks and (for the first time) view the same information on the Garmin chartplotter. (We did have to change a setting on the MultiData to enable the NEMA data to display.) With the exception of the radar, all the instruments were working, with more information at our fingertips.
That left one more connection to restore: the chartplotter to the PC. However, Garmin confirmed that we would no longer be able to send data to the 5208 from the computer. This highlighted a few of the changes from our existing 172C. The 5208 holds fewer routes and fewer waypoints than the 172C, and it no longer allows the charts to be displayed on the PC using Mapsource software. So, Dave decided to remove the wires that would have connected to the PC. Instead, he invested in multiple SD cards and card readers, since we will now need to use the cards more often to transfer information from the PC to the 5208 and vice versa.
We had a few more connections to make down below before we could have all of our functionality back. The VHF radio wire to its antenna had been disconnected to allow it to be used as a fish wire between the bottom of the mast and the nav station for the radar power and data. Once this was reconnected, we were able to transmit and receive again on the VHF. Then we connected the Garmin to the radio, enabling the radio to display our position again, and ensuring a DSC distress call would contain our position. There was only a small problem with the information that now displayed on the radio. It now had the date and time, but it was showing Jan. 6, with an incorrect time. After some searching, Dave discovered that a setting on the Garmin had caused the date/time to be reset to January 2000 when we connected the GPS. Once Dave changed the setting, the date/time reset to the current date.
Now, we just need to connect the radar . . .
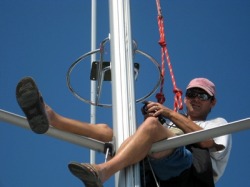
Mike goes up the mast to install the radar mount and a few other things.
Lighting Up
With plans to install a radar dome on the mast, we began looking at the list of projects that we could piggyback onto a trip up the mast. We planned to use the steaming light wires to fish the radar power and data cables down the mast to the deck, so it made sense to replace this light with a steaming / deck light combination. We had made several unsuccessful attempts to replace the 8W incandescent bulb in the anchoring fixture with an LED bulb, so we had been hoping to replace that fixture as well. Also, sometime over the winter, the Windex (an arrow indicating wind angle) had become bent and needed replacing. So, we ordered replacements for the 2 lights, the Windex, and then some LED bulbs for the fixtures (from mastlight.com). Mike, from the boatyard, then mounted them as he climbed the mast to do the radar installation. To make the installation easier, we replaced the anchoring light fixture with the same model. He still had a few problems, since one of the bolts would not release easily. It just convinced us of the wisdom of having someone else install them.
Of course, the primary reason for the trip up the mast was the installation of the radar mount. Dave had decided to go with one from Kato, which is easier to install because it is made to the specifications of our mast, and comes with a guard to prevent the headsail from being entangled with the dome or the mount. Mike drilled the holes for the mount, and then fed the power and data cables down the mast as Dave pulled them through. He then installed the mount, positioning it for the dome installation – but that would have to wait. Time had run out. Orion needed to be hauled and we were heading out of town the next day.
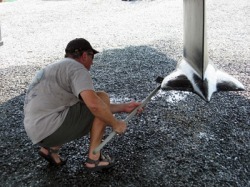
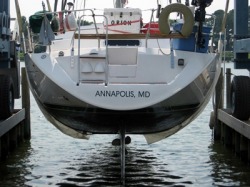
With the exception of the bottom of the keel, Orion's hull was clean.
Cleaning Up
Orion needed to be hauled in order to complete the repairs on her rudder, and we were reluctant to leave her in the water as we traveled north to Rochester as the hurricane season started to heat up. So, on the afternoon before we were to leave, she was hauled and we scrambled to clean even the smallest amount of growth from the bottom while it was wet and easy to remove. This would make it easier to do the bottom painting when we returned. Then, with the specter of a tropical storm on the horizon, we decided to do a full storm prep, removing canvas and securing loose items on deck.
Cathy took advantage of the removal of all of the glass in the enclosure to clean and waterproof the bimini. She also had the glass in the main windshield, which had been accidentally scratched, replaced by the local canvas maker, Ship’s Tailor, who made quick and economical work of the repair.
Living It Up
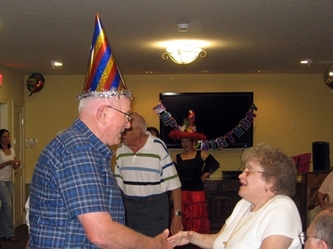
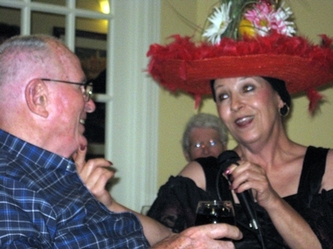
After working so hard on Orion, it was a treat to head to Rochester and a surprise 80th birthday party for Dave’s dad. We arrived the day before and spent much of the next day trying to set-up for the party, while keeping the surprise intact. It worked, and he was celebrated in style.
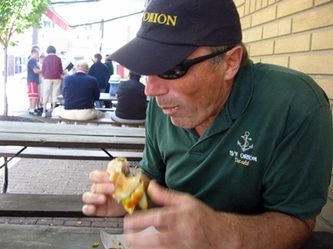
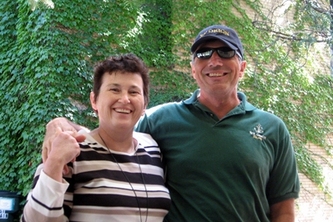
While in Rochester, we made our annual visit to the dentist, visited with Dave’s family and enjoyed some true Rochester cuisine, such as Italian sausage at Giovanni’s stand in Victor and chocolate almond fudge custard at Don’s Original. Mmmmm. . .
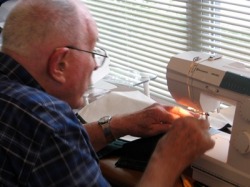
Cathy put Dave’s dad to work part of the time (keeping him distracted from birthday preparations), helping her make a second cockpit pocket. He did a great job, but sewing canvas is not going to be his new hobby.
Moving On
Rochester had the coolest temperatures we had seen all summer, which was a welcome relief from the heat of southern VA, but highs in the 60’s were a little too cool. So we’re ready to head further south in search of warmer weather (but not too much warmer).
